REVIEW · CHIANG MAI
Jewellery Making Class with Silversmithing in Chiang Mai
Book on Viator →Operated by Nova Collection Jewelry · Bookable on Viator
Your jewelry starts as a sketch. In Chiang Mai, this class turns that sketch into a start-to-finish handmade silver piece, and you get a take-home ring or pendant you made yourself. It’s a rare kind of souvenir: not bought, not borrowed, made.
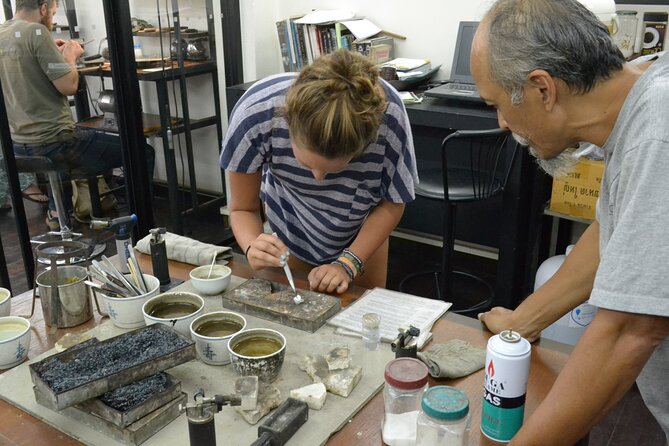
What I really like is the way the workshop focuses on your hands and your choices, not just watching. The instructor at Nova Collection Jewelry, including Nugoon, is friendly and patient, with 30+ years of silversmithing experience, and the teaching style is hands-on without taking over your work. One consideration: the course includes tools, but the silver material fee is added at the end at THB130 per gram, so your final total can move depending on your design.
In This Review
- Hands-on silversmithing in Chiang Mai: what makes it special
- Key points before you go
- Nova Collection Jewelry and the bench setup on Tha Phae Road
- Your design time: sketching a ring or pendant that fits you
- Shaping and joining silver: the craft steps you’ll actually learn
- Polishing and finishing: the moment it becomes wearable
- Timing and group size: a 10:30 am to 4:30 pm craft day
- Price and the THB130 per gram silver fee: how to budget well
- Who should book this silver ring class in Chiang Mai?
- Should you book Jewellery Making with Silversmithing in Chiang Mai?
- FAQ
- What is the class duration and start time?
- What does the class price include?
- Do I have to pay extra for the silver?
- What size is the class?
- What can I make in the class?
- Can I cancel for a full refund?
Hands-on silversmithing in Chiang Mai: what makes it special

This isn’t a showroom tour or a jewelry lecture. You sit down at the bench and learn the classic steps used by serious makers—drawing your design, forming silver pieces, joining them together, and finishing with polish. The class runs like a real craft process, with guidance when you need it and independence when you’re ready.
A big plus for first-timers: the class is built for all skill levels, and the group stays small (up to 6 travelers). That size matters. You can ask questions, get quick corrections, and actually finish something you’ll be proud to wear.
You can also expect a whole day feel (10:30 am to 4:30 pm) with a lunch break. It’s long enough to go from blank paper to shiny metal, but not so long that you’ll feel rushed through the details.
Key points before you go
- Small group format (max 6) means more time at the bench and less waiting your turn
- Tools included, but silver is paid separately at THB130 per gram at the end
- Make from start to finish: sketch, form, join, and polish your ring or pendant
- Expert instruction from Nugoon and other experienced silversmiths with 30+ years of experience
- Works for beginners and also suits young participants over 12 with adult supervision
You can also read our reviews of more tours and experiences in Chiang Mai


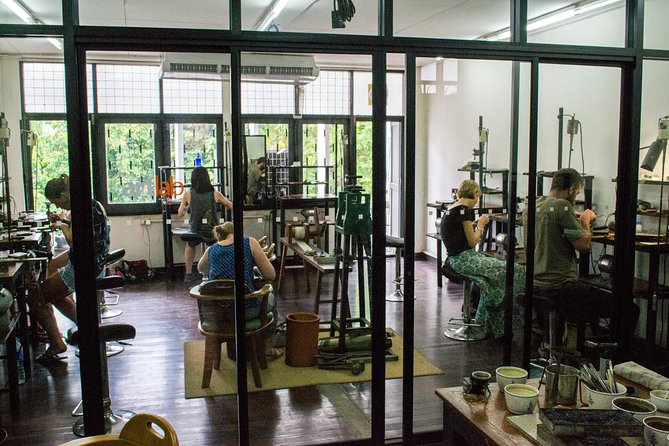
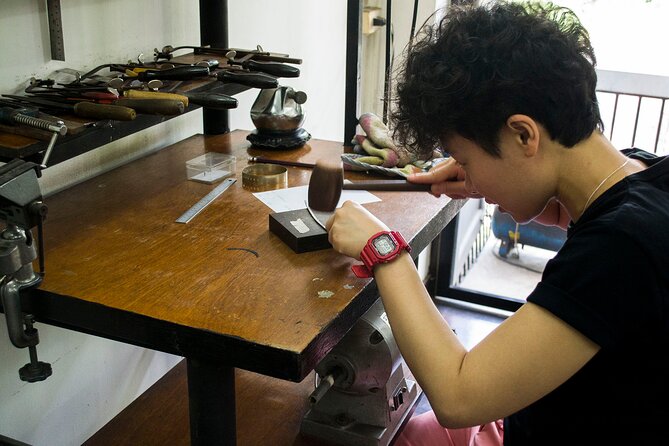
Nova Collection Jewelry and the bench setup on Tha Phae Road
You start at Nova Collection Jewelry on Tha Phae Road, right in the Chiang Mai area near public transportation. The location is practical if you’re already spending time around the old-city perimeter—easy to get to, easy to return to after.
You’ll be in a workshop environment where the tools matter. Since silversmithing is tactile, the included tools are a real value point: you’re not paying just to watch someone else work. The day is structured so you can learn techniques and actually apply them, rather than hopping between stations with unclear next steps.
One detail worth knowing: the class operates with a small maximum of 6 travelers. That usually means you’re less likely to feel like the instructor is split into five separate coaching sessions. You can ask about your design, your metal shaping, or the joining steps and get a straight answer.
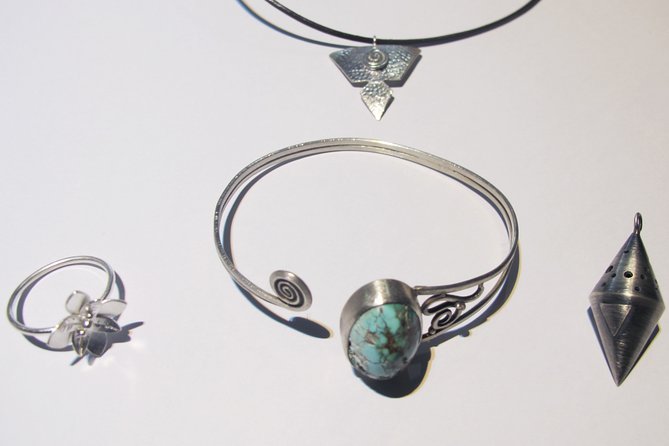
Your design time: sketching a ring or pendant that fits you
The first stage is design—simple, direct, and focused on something you can realistically make by the end of the session. You’ll draw a basic concept for a silver ring or pendant, then turn that drawing into pieces of metal.
This part is where the class becomes more than a fun activity. You’re not just picking from a pre-made mold. You’re learning how jewelers think: shape first, then how parts connect, then how the final object will sit and reflect light.
If you’re worried about skill level, you’re exactly the target. Beginners usually get stuck imagining everything that can go wrong. Here, the process is broken into steps you can handle: outline the idea, craft shapes from silver, form them, then join.
If you want your final piece to feel personal, use this design time for that. Think about a symbol, a simple geometry, or a clean silhouette you’ll actually wear later. A polished, wearable form beats a complicated concept you can’t finish.
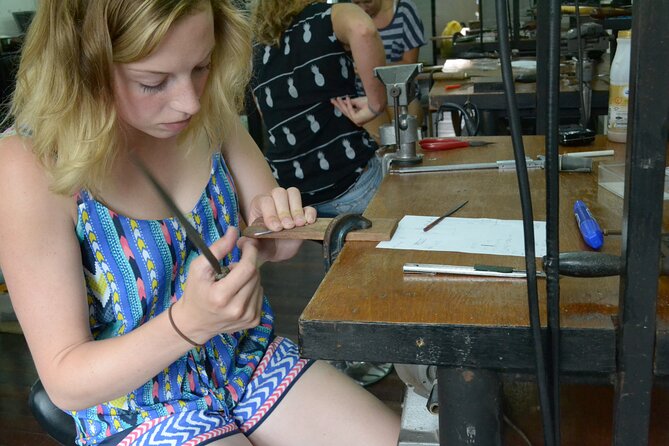
Shaping and joining silver: the craft steps you’ll actually learn
After the design comes the metallic work: crafting shapes from silver metal, forming them, and joining them together. This is the heart of the silversmithing class—where you’ll feel the difference between a piece that looks good in a photo and one that’s properly made.
The teaching style (including what people highlight from their experience) is supportive without taking over your hands. The instructor guides you through each step but still lets you do the work. That’s important. If everything is done for you, you don’t really learn the technique. Here, you should come away knowing how the process feels and what decisions you need to make at each stage.
You’ll also see how traditional methods still matter. Even though modern jewelry exists everywhere, these classic hand techniques are still used by independent makers and higher-end brands. That’s the long-term value of this class: you’re learning why metalwork is slow, intentional, and full of small adjustments.
Potential drawback: because this is hands-on and you’re learning while making, your pace matters. If you’re the type who wants results in 20 minutes, this might feel like a long time to get started. But the payoff is real—by the time you’re finishing, the work will feel like yours.
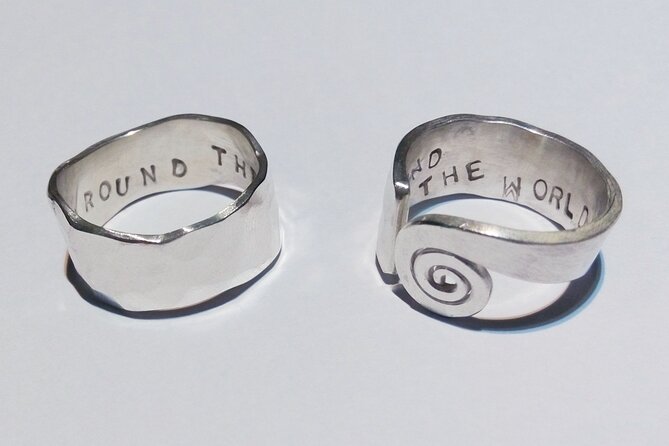
Polishing and finishing: the moment it becomes wearable
Finishing is where your piece goes from metalwork to jewelry. Once your ring or pendant is formed and joined, you’ll polish it to bring out the shine.
This step is more important than it sounds. A well-finished surface makes the design look cleaner, more intentional, and easier to wear day to day. Polishing also teaches you a basic jewelry truth: the final look comes from multiple stages, not one magic trick.
This is also a good moment to slow down and check your proportions and edges. If the class feels like it moves fast, the polish step is when you can see the object fully and understand how your design decisions translate into the real-world shape.
And yes, you leave with the piece. That’s a huge difference from workshops where you make a small component and someone else completes the main part. Here, the class is designed so you go home with the shiny silver jewelry you created.


Timing and group size: a 10:30 am to 4:30 pm craft day
The schedule runs from 10:30 am to 4:30 pm, with an hour lunch break in the middle. The total time is about 5 hours of workshop instruction, not a quick two-hour taster.
That matters because silversmithing needs time for proper steps—design, metal shaping, joining, and finishing. If the session were shorter, you might end with something incomplete. Here, the timing supports a full beginner-friendly arc: you start from a blank plan and end with an object.
Because the group cap is 6 travelers, the pacing tends to be steady rather than chaotic. You won’t be stuck waiting for long stretches, and your instructor can notice what’s going on with your hands, not just your finished result.
Lunch break practical note: the day includes a break, but the information provided doesn’t specify whether lunch is provided. Plan to eat nearby or bring something that works for your schedule.
Price and the THB130 per gram silver fee: how to budget well
The class price is $161.34 per person, and silver material is not included. You pay THB130 per gram at the end of class.
That separate material fee is the key budgeting variable. If you choose a simple design with less metal, you’ll likely stay closer to the base price. If you choose a bulkier ring or a more substantial pendant, you’ll need more grams, which pushes the final cost up.
Here’s how I’d approach it before you commit: aim for a design that matches your skill and time. A clean shape that’s easy to form and join usually requires fewer surprises during finishing. Your final piece can still look personal without being metal-heavy.
At the same time, the base price isn’t just for materials—it covers expert instruction and included tools, plus the full process coaching from design to polish. Given the small group and the fact that you take the final silver jewelry home, this is one of those experiences that can be worth it if you actually want a wearable souvenir.
Who should book this silver ring class in Chiang Mai?
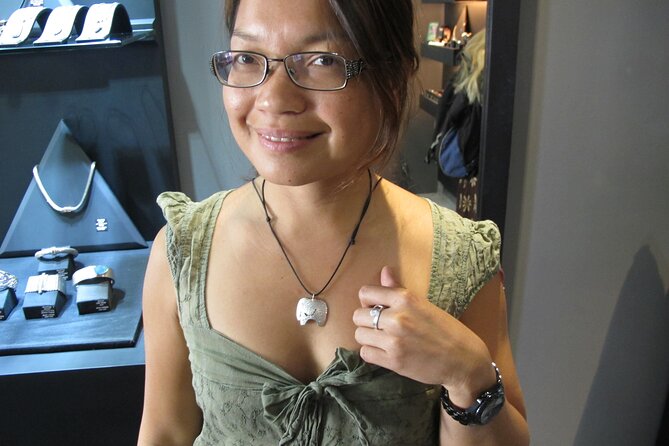
This is best for people who like doing things with their hands and want a souvenir with meaning. If you enjoy crafts, want a practical skill, or like the idea of wearing something you made while you were traveling, you’ll get real value.
It also suits families. The experience is offered for young children over 12 with adult supervision, and people have done it with their young adult children. If your group includes different ages, the small size helps keep attention on each participant.
Skill level is not a barrier. Beginners are welcome, and the instructor’s job is to walk you through the process step by step—while still letting you do the work.
If you hate mess, strong focus, or waiting while tools are set up, you might feel out of place. But if you’re okay getting a little hands-on and learning as you go, this class is a great fit.
Should you book Jewellery Making with Silversmithing in Chiang Mai?
Book it if you want a real craft experience with a clear outcome: a finished silver piece you made yourself. The small group size, the full start-to-finish process (sketch to polish), and the guidance style—friendly and thorough, without taking over—are the winning combination.
Skip it or think twice if you’re only looking for a quick activity and you don’t want any surprise costs. The silver is paid separately by the gram (THB130/gram), so your final bill depends on your design.
One smart tip: decide early to keep your design wearable and manageable. Your confidence will grow during the class, and a simpler concept usually gives you the best chance of a polished result you’ll enjoy wearing.
FAQ
What is the class duration and start time?
It starts at 10:30 am and runs until about 4:30 pm, with an hour lunch break included in the day.
What does the class price include?
Tools for silversmithing are included.
Do I have to pay extra for the silver?
Yes. The silver material fee is THB130 per gram, paid at the end of class.
What size is the class?
The maximum group size is 6 travelers.
What can I make in the class?
The class is built around making a silver ring or pendant from start to finish, and the overall experience is described as creating a piece such as a ring, pendant, or necklace depending on your work.
Can I cancel for a full refund?
You can cancel up to 24 hours before the experience’s start time for a full refund.